
Discord is a communication platform initially popularized by the gaming community but has since found widespread adoption across various domains, including trading. Known for its features that support both voice and text communication/messaging, Discord allows users to create servers, channels, and direct messages, facilitating an interactive environment for communities.
For traders and developers, Discord offers a tool for real-time collaboration, sharing trading strategies, and community engagement. Its integration capabilities with trading platforms like NinjaTrader 8 can enhance trading by enabling automated alerts, updates, and interactive features directly through Discord channels. This integration could allow traders to receive instant notifications about market movements, executed trades, or updates on trading indicators/strategies, making it an an important tool in modern trading.
Note: To integrate NinjaTrader with Discord (in this guide), you’ll need some level of coding experience. While you don’t need to be an expert, you will need to make edits to NinjaScript files and write a few lines of code. Don’t worry if you’re new to coding — I will guide you through the necessary code snippets and explain what each part does to help you get set up without hassle.
How Do I use Discord and NinjaTrader?
I use Discord in conjunction with NinjaTrader 8 to ensure I don’t miss important alerts or messages from my trading strategies or indicators, especially when I’m not at my trading computer. By setting up my NinjaTrader 8 to send notifications directly to a Discord channel, I can receive updates on market events, indicator alerts, or strategy executions (instantly).
Below, I walk through the steps to set up Discord and NinjaTrader to work seamlessly with your indicators and strategies (this is one of many ways traders could go about sending messages from NinjaTrader to Discord — this is what works for me).
Discord – Create Sever, Channel, and Bot
Step 1: if you have not already setup a Discord server, head over to this link to learn how to set one up. Also, make sure you create a channel for where your bot will send messages.
Step 2: navigate to the server from Step 1 and select the “v” next to your server name, here:
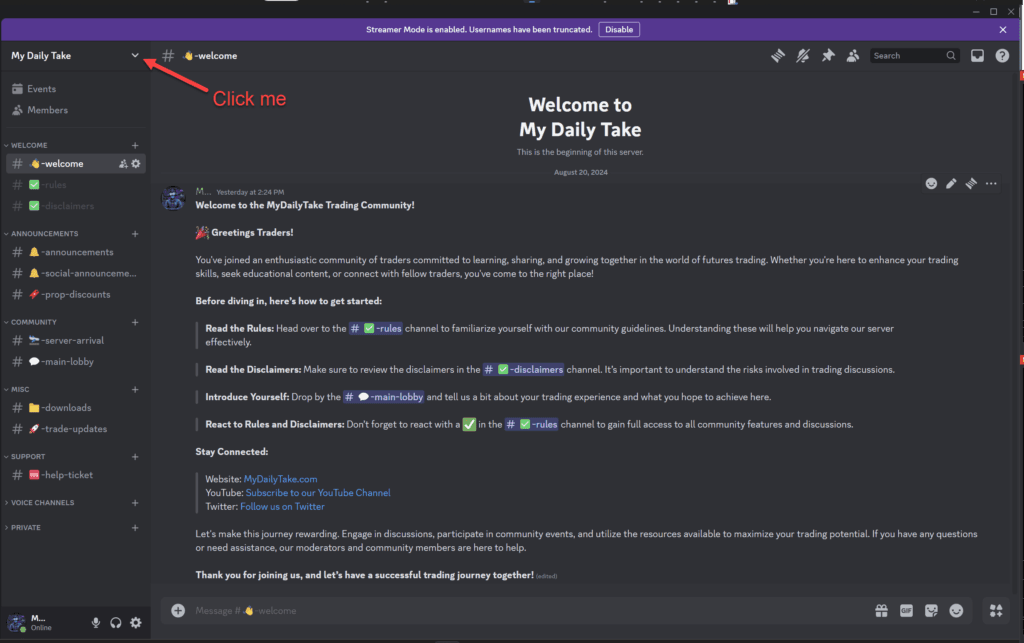
Step 3: from the dropdown menu, select “Server Settings”
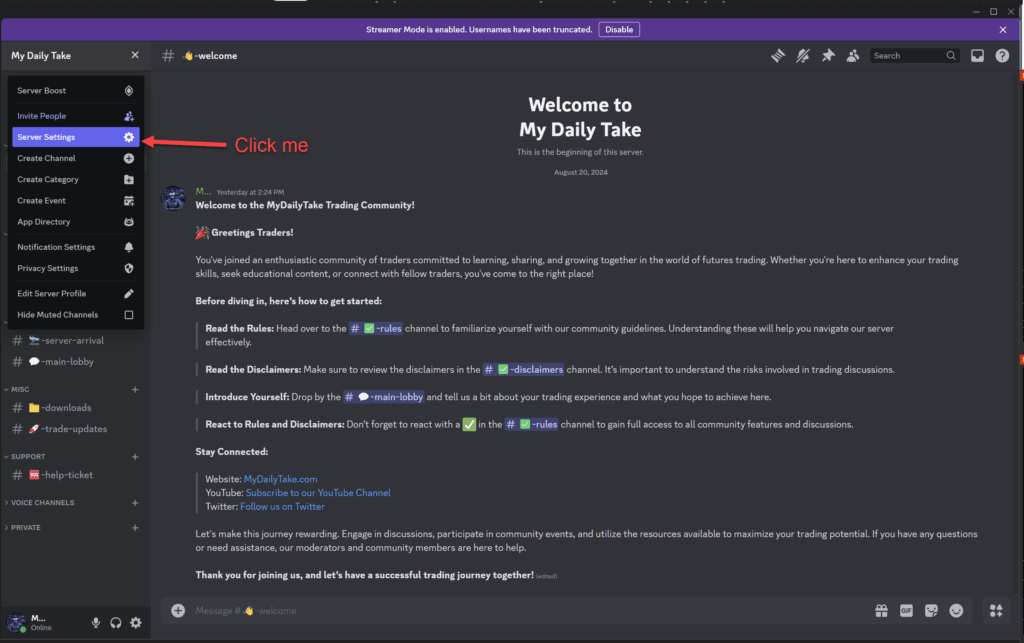
Step 4: from the new screen that appears, select “Integrations”
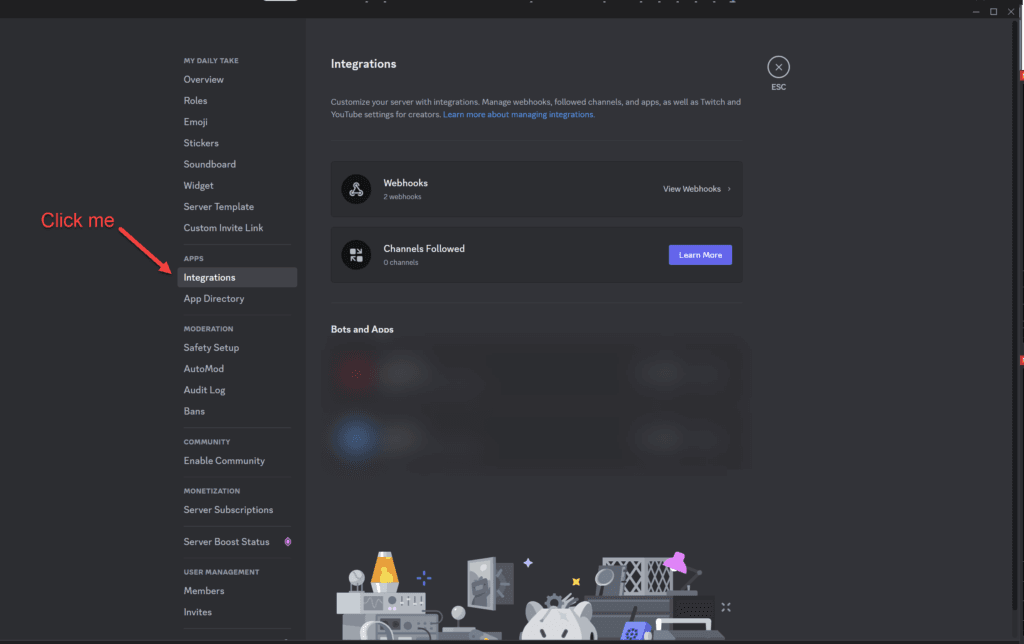
Step 5: Click “New Webhook”
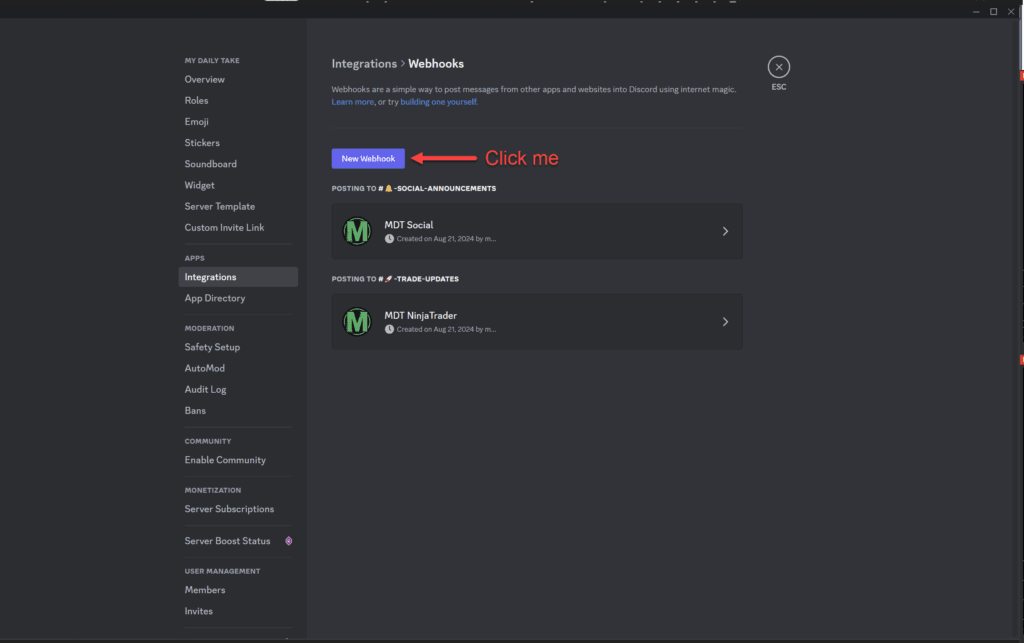
Step 6: Perform the following: 1) select a name for your bot, 2) select a channel where you want your bot to send messages, 3) click “Copy Webhook URL” (you will need this later, so paste this somewhere we can reference in the NinjaTrader section), and 4) don’t forget to click “Save Changes”
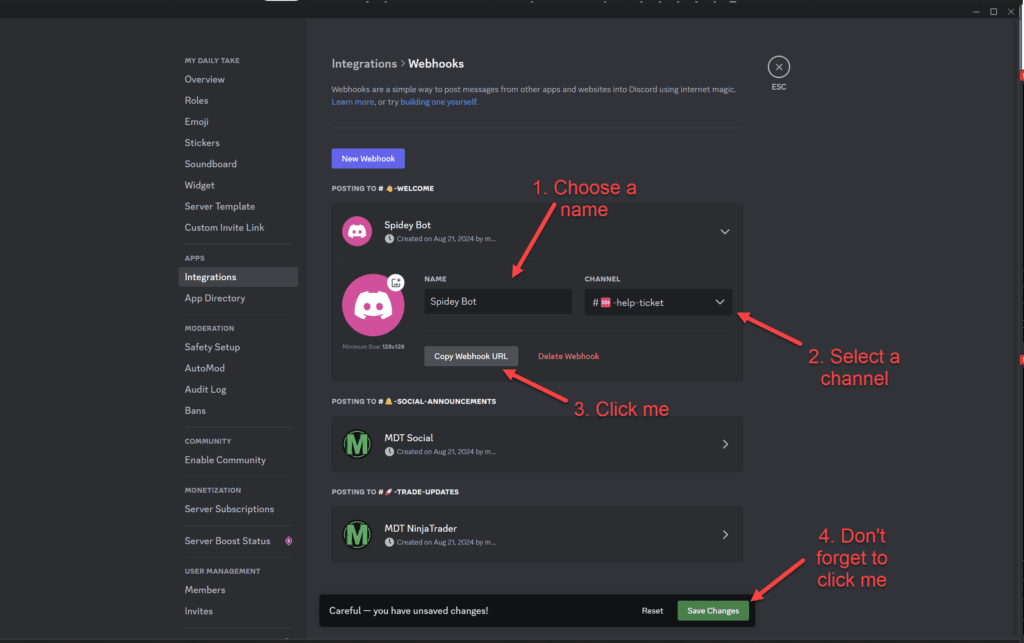
You are now ready to move onto configuring NinjaTrader. Please make sure you saved / pasted the Webhook URL somewhere we can use very shortly!
NinjaTrader – Configure Add-On to Send Discord Messages
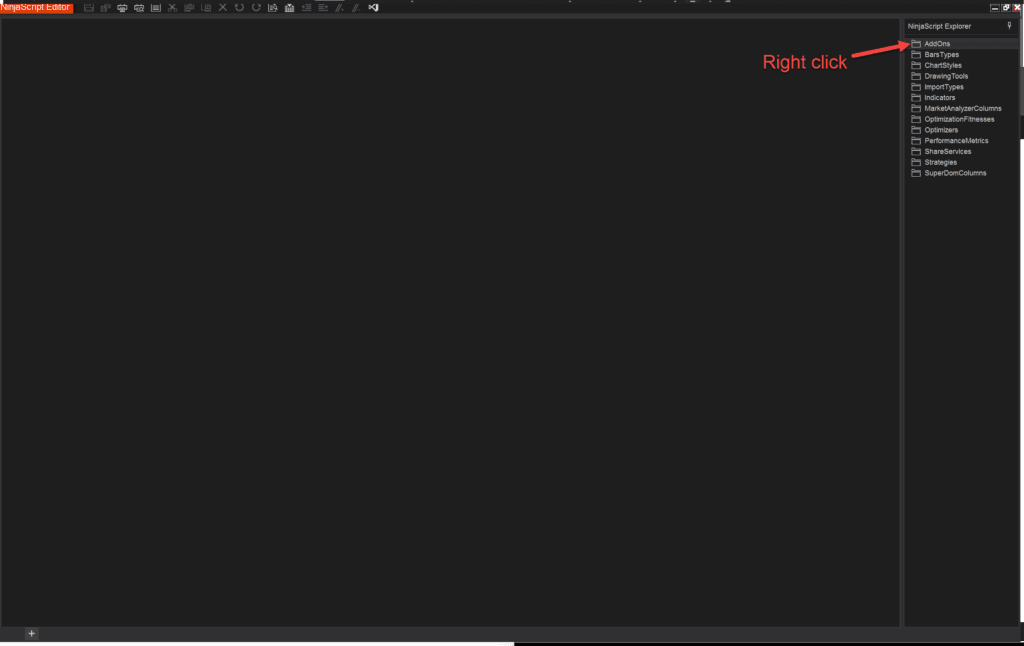
Step 1: Navigate to Control Center -> New -> NinjaScript Editor

Step 2: Right click on “AddOns”
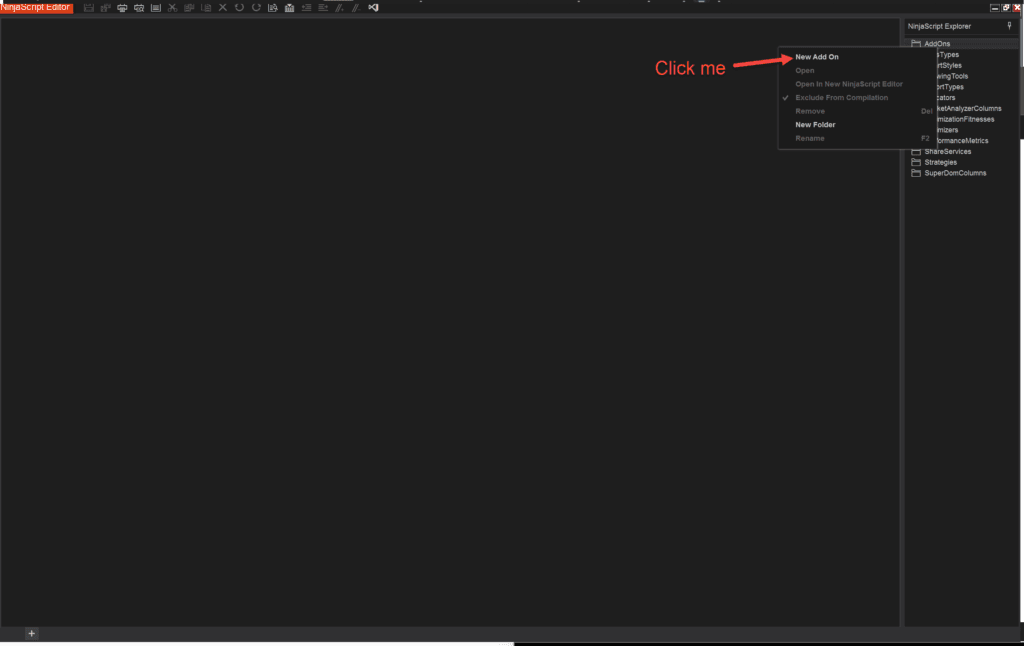
Step 3: Click “New Add On”
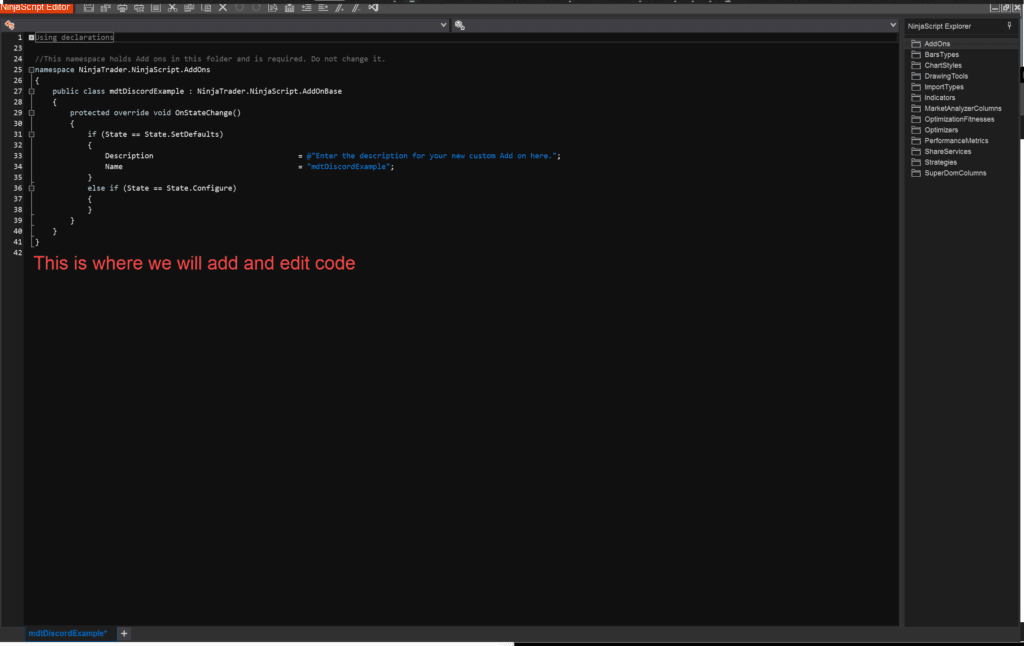
Step 4: Select “Next” and then for Name, input mdtDiscord, and then select “Generate”

Step 5: The file you just created should appear, like below, and you should be able to edit its code (don’t edit anything just yet)
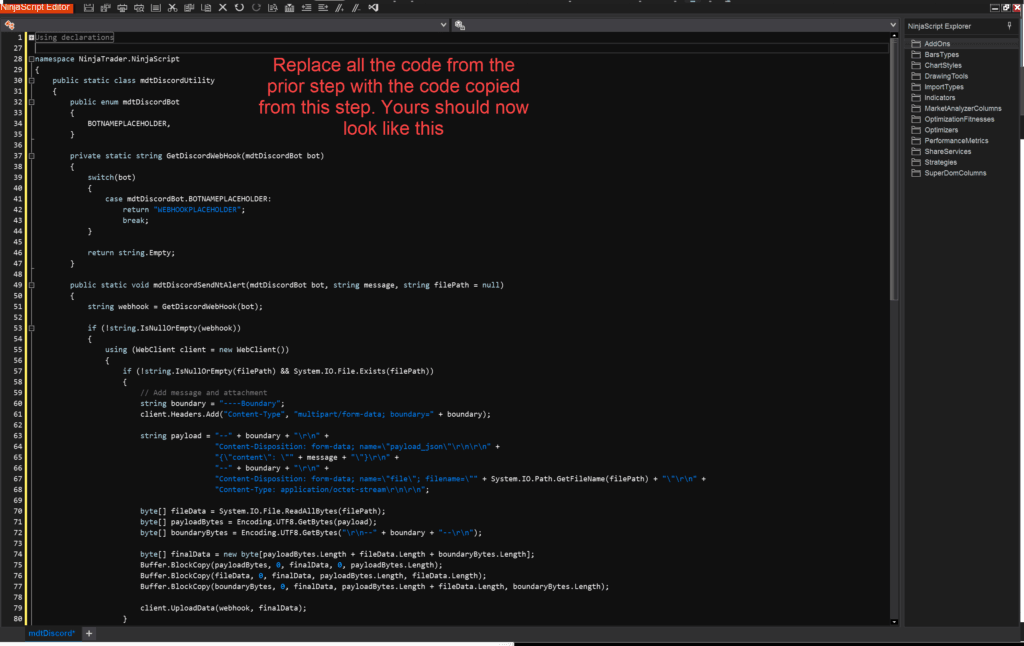
Step 6: Replace ALL of the code with the following (there’s a copy button in the top right corner of the below code snippet)
#region Using declarations
using System;
using System.Collections.Generic;
using System.ComponentModel;
using System.ComponentModel.DataAnnotations;
using System.Linq;
using System.Text;
using System.Threading.Tasks;
using System.Windows;
using System.Windows.Input;
using System.Windows.Media;
using System.Xml.Serialization;
using NinjaTrader.Cbi;
using NinjaTrader.Gui;
using NinjaTrader.Gui.Chart;
using NinjaTrader.Gui.SuperDom;
using NinjaTrader.Gui.Tools;
using NinjaTrader.Data;
using NinjaTrader.NinjaScript;
using NinjaTrader.Core.FloatingPoint;
using NinjaTrader.Gui.Tools;
using NinjaTrader.NinjaScript.DrawingTools;

using System.Net;
using System.Reflection;
#endregion

namespace NinjaTrader.NinjaScript
{
	public static class mdtDiscordUtility
	{
		public enum mdtDiscordBot
		{
			BOTNAMEPLACEHOLDER,
		}

		private static string GetDiscordWebHook(mdtDiscordBot bot)
		{
			switch(bot)
			{
				case mdtDiscordBot.BOTNAMEPLACEHOLDER:
					return "WEBHOOKPLACEHOLDER";
                    break;
            }

			return string.Empty;
		}

        public static void mdtDiscordSendNtAlert(mdtDiscordBot bot, string message, string filePath = null)
        {
            string webhook = GetDiscordWebHook(bot);

            if (!string.IsNullOrEmpty(webhook))
            {
                using (WebClient client = new WebClient())
                {
                    if (!string.IsNullOrEmpty(filePath) && System.IO.File.Exists(filePath))
                    {
                        // Add message and attachment
                        string boundary = "----Boundary";
                        client.Headers.Add("Content-Type", "multipart/form-data; boundary=" + boundary);

                        string payload = "--" + boundary + "\r\n" +
                                         "Content-Disposition: form-data; name=\"payload_json\"\r\n\r\n" +
                                         "{\"content\": \"" + message + "\"}\r\n" +
                                         "--" + boundary + "\r\n" +
                                         "Content-Disposition: form-data; name=\"file\"; filename=\"" + System.IO.Path.GetFileName(filePath) + "\"\r\n" +
                                         "Content-Type: application/octet-stream\r\n\r\n";

                        byte[] fileData = System.IO.File.ReadAllBytes(filePath);
                        byte[] payloadBytes = Encoding.UTF8.GetBytes(payload);
                        byte[] boundaryBytes = Encoding.UTF8.GetBytes("\r\n--" + boundary + "--\r\n");

                        byte[] finalData = new byte[payloadBytes.Length + fileData.Length + boundaryBytes.Length];
                        Buffer.BlockCopy(payloadBytes, 0, finalData, 0, payloadBytes.Length);
                        Buffer.BlockCopy(fileData, 0, finalData, payloadBytes.Length, fileData.Length);
                        Buffer.BlockCopy(boundaryBytes, 0, finalData, payloadBytes.Length + fileData.Length, boundaryBytes.Length);

                        client.UploadData(webhook, finalData);
                    }
                    else
                    {
                        // Send just the message if no file is provided or the file doesn't exist
                        client.Headers.Add("Content-Type", "application/json");
                        string payload = "{\"content\": \"" + message + "\"}";
                        client.UploadData(webhook, Encoding.UTF8.GetBytes(payload));
                    }
                }
            }
        }
	}
}
Your code should look similar to this:
Step 7: We need to replace two things before we can even attempt to send messages. First, we want to update the Bot name in two places (something that you can recognize). For me, my Bot name in Discord is MDT NinjaTrader, so I am going to use MDTNinjaTrader in the code below (do not add spaces in the name). In the code above, you want to replace BOTNAMEPLACEHOLDER with your new name (e.g., MDTNinjaTrader) on lines 34 and 41
public enum mdtDiscordBot
{
	MDTNinjaTrader, // Changed from BOTNAMEPLACEHOLDER to MDTNinjaTrader
}
private static string GetDiscordWebHook(mdtDiscordBot bot)
{
switch(bot)
{
case mdtDiscordBot.MDTNinjaTrader: // Changed from BOTNAMEPLACEHOLDER to MDTNinjaTrader
return "WEBHOOKPLACEHOLDER";
break;
}
return string.Empty;
}You will also need the Webhook from Discord Step 6. In the code, you want to replace WEBHOOKPLACEHOLDER with your Discord Webhook on line 42 (see a truncated example below). Make sure that your webhook URL is in-between the parenthesis.
private static string GetDiscordWebHook(mdtDiscordBot bot)
{
	switch(bot)
	{
		case mdtDiscordBot.MDTNinjaTrader:
			return "https://discord.com/api/webhooks/TRUNCATED"; // Replace WEBHOOKPLACEHOLDER with your full webhook
            break;
    }

	return string.Empty;
}
Your code should look similar to this:

Step 8: Save the file by clicking ctrl + s, right clicking and selecting Save, or selecting the save icon in the top toolbar (on the left)
Step 9: Compile the file by clicking F5, right clicking and selecting Compile, or select compile from the toolbar. You should not receive any errors, but if you do AND the error relates to the file you just created, send us a message with enough information to help resolve the problem (images, detailed description, etc.). We also built this using NinjaTrader 8.1.2.0, so it’s possible this will not work on other versions of NinjaTrader. If you need to delete the file for any reason, you can always go to Documents\NinjaTrader 8\bin\Custom\AddOns and delete the file mdtDiscord.cs
Once NinjaTrader successfully compiles, we are now ready to send our first message!
NinjaTrader – Sending a Message to Discord
Step 1: If you already have the NinjaScript Editor open, great, nothing to do in this first step. But if you don’t, we need to open the NinjaScript Editot: Navigate to Control Center -> New -> NinjaScript Editor
Step 2: Download the example code (zTestExampleDiscord.cs): click me to download
Step 3: Copy the file you downloaded in Step 2 to Documents\NinjaTrader 8\bin\Custom\Indicators
Step 4: Return to the NinjaScript Editor from Step 1 (if there are errors in your NinjaScript Editor at this point, you can ignore them — we should be fixing them through the next several steps). Double click on the Indicator folder (in the right pane) to expand and see the indicators within the folder. Scroll until you find zTestExampleDiscord. Double click on that file to open and see the code

Step 5: In the file you opened from Step 4, we need to make one update. On line 51, you need to change MDTNinjaTrader to the name from Discord Step 7 (i.e., the name you used to replace BOTNAMEPLACEHOLDER)
DiscordBot = mdtDiscordUtility.mdtDiscordBot.MDTNinjaTrader; // Replace MDTNinjaTraderStep 6: Save the file by clicking ctrl + s, right clicking and selecting Save, or selecting the save icon in the top toolbar (on the left)
Step 7: Compile the file by clicking F5, right clicking and selecting Compile, or select compile from the toolbar. You should not receive any errors, but if you do AND the error relates to the file you just edited, send us a message with enough information to help resolve the problem (images, detailed description, etc.). We also built this using NinjaTrader 8.1.2.0, so it’s possible this will not work on other versions of NinjaTrader. If you need to delete the file for any reason, you can always go to Documents\NinjaTrader 8\bin\Custom\Indicators and delete the file zTestExampleDiscord.cs
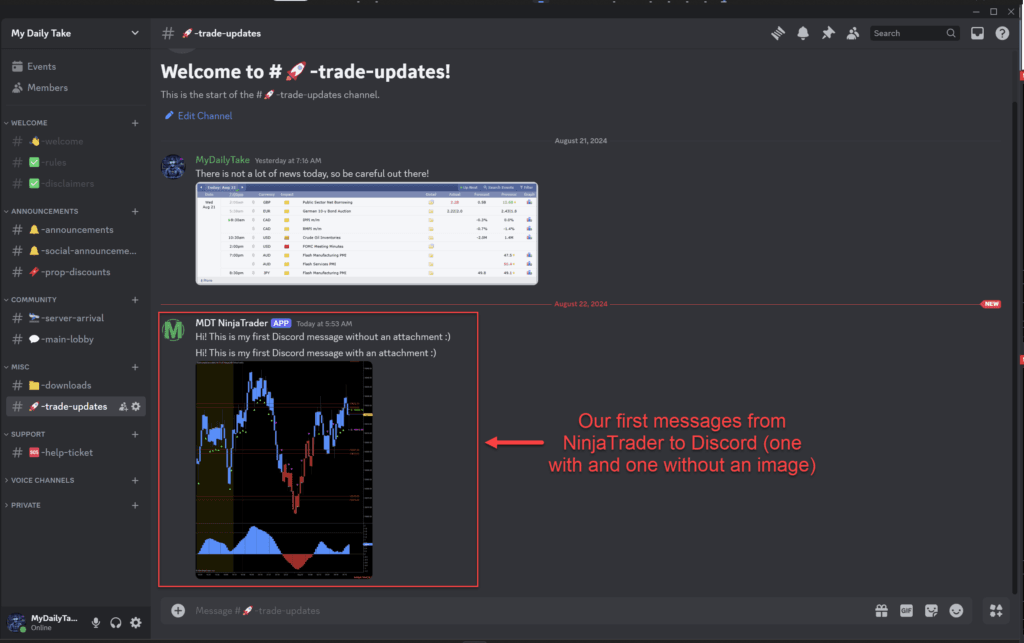
Step 8: Now it’s time to test our bot. Load the indicator on any chart and when NinjaTrader gets to State.DataLoaded, two messages will be sent to Discord: 1) a message without a screenshot and 2) a message with a screenshot
Quick notes on the code
If you were to look at the code in the file zTestExampleDiscord.cs, I would call your attention to a few areas.
First, I added two “using” statements to make taking our screenshot and saving it easier (see lines 23 and 24):
using System.IO;
using System.Windows.Media.Imaging;
We also added a property starting on line 31 to allow you to select what Discord Bot you would like to send the message (see below, Managing Multiple Bots to see how to easily add more Discord Bots):
[NinjaScriptProperty]
[Display(Order = 01, GroupName = "Discord Inputs", Name = "Discord Bot", Description = "Select the Bot you would like to send a message.")]
public mdtDiscordUtility.mdtDiscordBot DiscordBot { get; set; }
We then set the default value for DiscordBot in State.SetDefaults, at line 51:
DiscordBot = mdtDiscordUtility.mdtDiscordBot.MDTNinjaTrader;On line 55 we send a message without a screenshot and on line 56, we send a message with a screenshot:
SendDiscordMessage("Hi! This is my first Discord message without an attachment :)");
SendDiscordMessage("Hi! This is my first Discord message with an attachment :)", true);
We also use two methods to help us send our messages, starting on line 62:
private void SendDiscordMessage(string message, bool addScreenshot = false)
		{
			if(addScreenshot)
				SendDiscordMessageScreenshot(message);
			else
				mdtDiscordUtility.mdtDiscordSendNtAlert(DiscordBot, message);
		}

		private void SendDiscordMessageScreenshot(string message)
		{
		    Dispatcher.InvokeAsync(new Action(() =>
		    {
		        NinjaTrader.Gui.Chart.Chart chart = Window.GetWindow(ChartControl) as NinjaTrader.Gui.Chart.Chart;
		        if (chart != null)
		        {
		            RenderTargetBitmap screenCapture = chart.GetScreenshot(ShareScreenshotType.Chart);
		            if (screenCapture != null)
		            {
		                PngBitmapEncoder png = new PngBitmapEncoder();
		                BitmapFrame outputFrame = BitmapFrame.Create(screenCapture);
		                png.Frames.Add(outputFrame);

		                string screenshotPath = Path.Combine(Core.Globals.UserDataDir, "MyScreenshot.png");
		                using (Stream stream = File.Create(screenshotPath))
		                    png.Save(stream);

		                Print("Screenshot saved to " + screenshotPath);
		                mdtDiscordUtility.mdtDiscordSendNtAlert(DiscordBot, message, screenshotPath);
		            }
		            else
		            {
		                Print("Failed to capture screenshot.");
		            }
		        }
		        else
		        {
		            Print("Chart control is not found.");
		        }
		    }));
		}
Managing Multiple Bots
If you’re like me, you may want the ability to send messages with multiple Discord Bots. No worries, we can do that with a few additional lines of code! (the below will assume you have the Discord bots already created and know their associated webhooks)
Step 1: The first thing we want to do is open the Add-on from the Discord steps above (for me that was the file mdtDiscord).
Step 2: We want to add another “bot” or “name” to the enum mdtDiscordBot, like this (replace NEWBOTNAMEGOESHERE):
public enum mdtDiscordBot
{
		MDTNinjaTrader,
		NEWBOTNAMEGOESHERE // update here with new bot name (no spaces)
}
Step 3: We now need to “assign” NEWBOTNAMEGOESHERE to its associated webhook like this (replace NEWBOTNAMEGOESHERE and UPDATEWITHYOURNEWWEBHOOKURL):
switch(bot)
{
  case mdtDiscordBot.MDTNinjaTrader:
    return "OLDWEBHOOKURL";
    break;
	case mdtDiscordBot.NEWBOTNAMEGOESHERE: // update here with new bot name (no spaces)
    return "UPDATEWITHYOURNEWWEBHOOKURL"; // update here with webhook URL
    break;
}
Step 4: Now it’s time to save and compile (see steps above outlining how to save and compile). Assuming no errors after you compile, you can load the zTestExampleDiscord on a chart and you will notice that the dropdown property (Discord Bot) will now contain your newly added bot from Step 2. Select this bot, click OK, and those two test messages should be sent by your new Discord Bot.
Conclusion
Setting up Discord with NinjaTrader 8 lets you receive real-time trading alerts directly, wherever you are. This guide has walked you through each step to help you connect NinjaTrader with your own Discord Bot. I hope this tutorial was helpful and remember, this isn’t the only way to integrate these tools—feel free to experiment, make changes, and share what works for you with the community. Your insights could be invaluable to other traders.
🎉 Prop Trading Discounts
💥91% off at Bulenox.com with the code MDT91
